AI for
forensic eyes.
Use AI and the terminal to triage photos, search hours of CCTV, transcribe, redact and report, while the evidence stays on your machine and stays exactly as you found it.
Two days, one case.
You already know the AI basics and Claude Code. Now we point them at real forensic work: one practice case runs through both days, and you finish with a verified report.
Foundations & images
- 01AI meets evidenceWhat AI may and may not do, and the rules that keep you court-safe.
- 02The workstationTools, a standard case folder, hashing and the command log.
- LABLab 1 · Open a caseFolder, copy, fingerprint, lock.
- 03ImagesMetadata, timelines, duplicates, edits and AI-made pictures.
- LABLab 2 · Photo triage200 photos into one timeline and map.
Video, audio & the report
- 04Video & CCTVKnow the file, stamp the frames, find the events, clip safely.
- LABLab 3 · Three hours of CCTVFrom footage to a short event list.
- 05Audio, privacy & fakesOffline transcripts, redaction and deepfake awareness.
- 06The full caseRun it end to end, write the report, prove nothing changed.
- LABLab 4 · CapstoneYour own case file, start to finish.
AI writes the tool.
Your machine touches the evidence.
You will not upload evidence to an AI and ask it what it sees. You will ask the AI to write, explain and check small programs, and those programs run locally on copies of the evidence, with every step logged.
AI does
Writes commands and scripts, explains every flag, fixes errors, organises output, drafts the report from your log.
Your machine does
Reads the evidence, hashes it, extracts frames, metadata and audio. Nothing evidential needs to leave the building.
You do
Decide, look, verify and sign. Every finding in the report is yours, checked with your own eyes.
AI meets evidence.
Where AI earns its place in a forensic lab, where it must never go, and the habits that keep your work admissible.
Where AI helps, where it must not.
AI is brilliant at the boring, high-volume parts of visual forensics. It has no place in the parts that need a sworn human judgement.
Let AI speed this up
- Triage: sort 2,000 photos by time, camera and place.
- Search: turn 3 hours of CCTV into 5 moments worth watching.
- Scripting: write and explain ffmpeg, exiftool and Python commands.
- Transcripts: a first draft of what was said, with timestamps.
- Paperwork: logs, exhibit lists and a first draft of the report.
Keep AI out of this
- Identifying a person, face or vehicle. That is an examiner's call.
- "Enhancing" an image so a detail appears that wasn't recorded.
- Deciding whether footage is genuine on one tool's score.
- Holding original evidence in a chat window or cloud upload.
- Signing anything. The report's conclusions are a human's.
“Enhance!” is not evidence.
Generative AI doesn't recover detail. It invents the most likely detail and draws it sharply. Feed one blurry plate to three AI upscalers and you get three confident, different answers.
The evidence never leaves the machine.
Claude Code runs in your terminal, but the thinking happens in the cloud. Whatever it reads or whatever a command prints is sent there. So you choose what it is allowed to see.
Your workstation
- Original evidence on read-only storage
- Working copies and every output file
- The tools: ffmpeg, exiftool, Python, Whisper
- The log and the report
The AI model
- Your description of the task (no names, no case details)
- File names and counts, if your policy allows
- Photos, frames, video, audio of a real case
- Personal data: names, IC numbers, addresses, plates
Three levels of trust.
Your agency's SOP picks the level, not convenience. When in doubt, go one level stricter.
Practice data
Training files, public samples, test footage. Claude may read and run everything. This is how we work in the labs.
Case, text only
Claude runs the commands, but originals are locked from it and only text output comes back: hashes, durations, counts. No images, no transcripts.
Sensitive case
Claude only writes and explains the script. You run it yourself in a separate terminal it can't see. Nothing about the case reaches the AI.
{ "permissions": { "deny": [ "Read(./00_original/**)", "Edit(./00_original/**)" ] } }
A fingerprint for every file.
A SHA-256 hash is a 64-character fingerprint. Change one pixel and it changes completely. Hash the original first, work only on copies, and you can prove the original never changed.
- Hash the original the moment it arrives.
- Copy it to a working folder and check the copy's hash matches.
- Work only on copies. Their hashes will change; that's expected.
- Re-hash the original at the end. Same fingerprint = untouched.
The forensic prompt formula.
Four parts, every time. Describe the job and the rules, never the case.
1 · Context
Where the files are and what kind they are. "200 JPEGs in 01_working/photos".
2 · Task
One clear job. "List each photo's capture time, camera and GPS."
3 · Rules
"Never write to 00_original. Log every command. Explain before you run."
4 · Output
Exactly what you want back. "A CSV in 02_exports, sorted by time."
The case folder is PC-001. Photos are in 01_working/photos (JPEG). Make a CSV of every photo's capture time, camera make and model, software and GPS. Never write to 00_original, log every command to logs/commands.md, and explain the command before you run it. Save the CSV to 02_exports/photo_timeline.csv sorted by capture time.
Read it before you run it.
Keep Claude in its default mode: it asks before every command. That pause is your quality control, and it's what lets you say in court that you understood each step.
● Bash(ffmpeg -ss 00:36:00 -to 00:38:00 -i 01_working/CAM02.mp4 -c copy 02_exports/clip_1436.mp4)

  Do you want to run this command?
  ❯ 1. Yes
    2. Yes, and don't ask again for ffmpeg
    3. No, and tell Claude what to do differently
- Check the paths. Input from 01_working, output to 02_exports. Never 00_original.
- Don't understand a flag? Answer 3 and ask: "explain every part of that command".
- Never use the skip-permissions mode on case work.
- Approved commands go into logs/commands.md with time and output.
Trust, but verify.
AI is fast and usually right, which is exactly why its rare mistakes slip through. Build the check into the job.
| What AI might do | What it looks like | Your check |
|---|---|---|
| Summarise wrongly | "The car arrives at 14:36" when the clip says 14:63 on a bad DVR clock | Open the frame yourself at every time you quote |
| Miss something | Motion detection skips a person in shadow | Spot-watch the gaps between events at 4× speed |
| Invent a detail | A transcript fills an unclear word with a likely one | Mark unclear audio as [inaudible], never guess |
| Use the wrong file | Runs on a re-encoded copy instead of the remux | Every output lists its input file and hash |
| Sound certain | "This image is definitely AI-generated" | Treat any single detector as a lead, not a finding |
The ground rules.
The workstation.
Free, court-proven tools installed by one sentence, a case folder everyone in the unit recognises, and a log that writes itself.
Six free tools, decades of trust.
You don't need expensive software to start. These open tools are used in labs worldwide, run fully offline, and Claude knows every one of them well.
ffmpeg · ffprobe
Inspect, convert, cut, extract frames and audio from almost any video, including many DVR exports.
ExifTool
Reads the hidden data inside photos and videos: capture time, camera, GPS, editing software.
ImageMagick
Batch crops, contact sheets, comparisons and documented adjustments on thousands of images.
Python + OpenCV
Motion detection, face and plate blurring, duplicate finding. Claude writes the scripts.
Whisper (local)
Speech to text with timestamps, English and Malay, running on your own machine.
Hashing
shasum on Mac, certutil or Get-FileHash on Windows. Already installed, nothing to add.
Install with one sentence.
No hunting for downloads. Ask Claude to install the toolkit, check each tool runs and record the versions.
Install ffmpeg, exiftool, ImageMagick and Python with OpenCV on this computer. Check each one runs, then write every tool's name and exact version into tools.md with today's date.
“Which software, which version?”
Expect that question under cross-examination. A results file is only repeatable if someone can run the same version of the same tool. Keep a tools.md in every case.
- Write it before you start, not from memory afterwards.
- Include the AI. Say honestly that Claude Code wrote and ran commands.
- Keep scripts in the case folder, so the exact code is part of the record.
Update tools.md with the version of every tool you used today, and copy every script you wrote into the scripts folder.
One folder shape, every case.
When every case looks the same, anyone in the unit (and Claude) knows where the originals are, where the work is, and where the results go.
Create a case folder called PC-001 with this structure: 00_original with photos, cctv and audio inside, 01_working, 02_exports, scripts, logs, plus empty tools.md and report.md. Write a CLAUDE.md that says: never read or write 00_original, log every command to logs/commands.md, explain before running.
Lock the originals, three ways.
Belt, braces and a second belt. Each lock catches a different kind of mistake.
1 · At the source
Copy from the seized drive through a write blocker or as read-only media, as your SOP already requires. Nothing new here.
2 · On the disk
Make the folder read-only so no program can change it.
3 · From the AI
The deny rule in .claude/settings.json from 1.4 stops Claude from opening or editing anything inside, even if asked.
One manifest, every file.
Hashing one file by hand is fine. A real case has hundreds. Claude writes the command that fingerprints everything at once and saves the list.
- manifest.txt holds one line per file: fingerprint and path.
- Make it first, before any processing, and note the time in the log.
- Check it last. One command compares every file to its line. Chapter 6.
- Keep a copy of the manifest with the exhibit paperwork.
If it isn't logged, it didn't happen.
Your notes are part of the evidence. Let Claude keep a running log of every command: when, what, on which file, and what came out. Your report is built from it.
For the rest of this case, after every command you run, append to logs/commands.md: the time, a one-line purpose, the exact command and a short summary of the result.
Lab 1: open a case.
1 · Get the practice kit
Practice data only (Level 1). It holds photos, a 3-hour CCTV recording and an audio clip, all made for this course.
Your trainer shares it on a USB drive or shared folder before the lab.
Unzip practice-case-PC-001.zip from my Downloads into a folder called evidence-in on my Desktop and tell me what's inside: how many files of each type and their total size.
2 · Build the case folder
Use the standard shape from 2.4. Claude also writes the rules file it must obey.
Create a case folder Cases/PC-001 with 00_original (photos, cctv, audio), 01_working, 02_exports, scripts, logs, tools.md, report.md, and a CLAUDE.md with our forensic rules. Add .claude/settings.json that denies Read and Edit on 00_original.
3 · Bring the evidence in
Copy, never move. The source stays where it was, so you can re-check against it.
Copy everything from Desktop/evidence-in into Cases/PC-001/00_original, sorted into photos, cctv and audio by file type. Copy, don't move. Log it.
4 · Fingerprint everything
The manifest is your day-one proof. Make it before anything else touches the files.
Make a SHA-256 manifest of every file in 00_original and save it to logs/manifest.txt. Then hash the files in Desktop/evidence-in and confirm every hash matches.
5 · Lock it and test the lock
Make the folder read-only, then try to break your own rule.
Make 00_original read-only. Then try to open 00_original/photos/IMG_0001.jpg and tell me what happened.
6 · Make verified working copies
Everything from here on happens on these copies.
Copy 00_original into 01_working with the same sub-folders using the shell, verify every copy against logs/manifest.txt, and record the result in logs/commands.md.
The workstation is ready.
What the photos are hiding.
Every digital photo carries a second story in its metadata. Read it at scale, build timelines and maps, find duplicates, and spot editing and AI-made images.
What's inside a photo.
EXIF metadata is written by the camera or phone at the moment of capture. ExifTool reads hundreds of fields; these are the ones that matter most in a case.
 IMG_0412.jpg
- DateTimeOriginal
- 2026:10:30 14:36:11
- OffsetTimeOriginal
- +08:00
- Make / Model
- Apple · iPhone 15
- GPSLatitude / Longitude
- 3.1478, 101.6953
- Software
- 17.6.1
- ModifyDate
- 2026:10:30 14:36:11
- ImageSize
- 4032 × 3024
- IMG_0413 · Software
- Adobe Photoshop 25.0 edited
- IMG_0420 · DateTimeOriginal
- (missing) stripped?
Time is tricky.
The capture time is only as good as the device clock. Before you build any timeline, work out each device's offset from real time.
Wrong clock
A DVR set 7 minutes fast, or never set since a power cut. Common in CCTV.
Time zone
Some fields are local time, some UTC. A "Z" means UTC, +08:00 is Malaysia.
Copies and edits
File dates change on copy. Trust DateTimeOriginal, not the file's "modified" date.
CAM02's on-screen clock shows 14:43:10 in the frame where the reference phone shows 14:36:05 (+08:00). Work out CAM02's offset, write it in logs/clock_offsets.md, and apply it in a new "corrected_time" column, keeping the original time too.
2,000 photos, one timeline.
What used to take a day of right-click → Properties now takes one command. ExifTool reads every file; Claude turns it into a sorted, readable table.
| Time (+08) | File | Device | GPS |
|---|---|---|---|
| 14:02:44 | IMG_0398 | iPhone 15 | 3.1471, 101.6949 |
| 14:11:09 | DSC_2210 | Nikon D7500 | none |
| 14:36:11 | IMG_0412 | iPhone 15 | 3.1478, 101.6953 |
| 14:36:40 | IMG_0413 | Photoshop | none |
| 15:42:03 | IMG_0431 | iPhone 15 | 3.1480, 101.6960 |
| (no time) | IMG_0420 | unknown | none |
Use exiftool to read capture time, time offset, make, model, software and GPS from every photo in 01_working/photos. Save it as 02_exports/photo_timeline.csv sorted by time, and list separately any photo with no capture time or with editing software.
GPS points, on a map.
Ask for a single HTML page that plots every photo with GPS, colour-coded by time, with the file name and time on each pin. Open it in a browser, no installs.
From 02_exports/photo_timeline.csv make 02_exports/photo_map.html: one pin per photo with GPS, coloured from early (blue) to late (red), each pin showing file name and time, and a line joining them in time order.
Same photo, different file.
Seized devices are full of copies: forwarded, resized, screenshotted. Two kinds of fingerprint find them.
SHA-256
Finds files that are bit-for-bit identical, whatever their names. Instant, and certain.
Perceptual hash
Finds pictures that look the same after resizing, recompressing or a small crop. Gives a similarity score; you confirm by eye.
Write a Python script in scripts/ that groups the photos in 01_working/photos into exact duplicates (same SHA-256) and look-alikes (perceptual hash distance 8 or less). Save the groups to 02_exports/duplicates.csv and make a contact sheet image for each look-alike group so I can check them by eye.
Has it been edited?
No single test proves a photo is genuine. You collect signals, and several pointing the same way justify a closer, expert look.
| Signal | What it suggests | Tool |
|---|---|---|
| Editing software in metadata | Opened and saved by an editor (could be a harmless crop) | exiftool -Software |
| Capture time missing or after file time | Metadata stripped or rewritten | exiftool -time:all |
| Thumbnail doesn't match the image | Main image changed, embedded preview not updated | exiftool -b -ThumbnailImage |
| Uneven compression (ELA) | One area saved a different number of times | ImageMagick compare |
| Wrong quantisation table for the camera | Saved by software, not straight from the camera | exiftool -JPEG* |
Was it made by AI?
AI images are now realistic enough to fool people and detectors. Check where it came from before you judge what it looks like.
Provenance
Content Credentials (C2PA) are signed records some cameras and AI tools attach. Read them with c2patool. Present = strong clue; absent proves nothing.
Visual tells
Hands, text, reflections, shadows that disagree, ear and jewellery details, repeating textures. Fewer every year, so never rely on them alone.
Detectors
Give a probability, not an answer. They miss new generators and flag real photos. Use two or more, and only as a lead.
Enhance the right way.
You may make a picture easier to see. You may not make it show something new. The test: is the change global, repeatable and written down?
Allowed, with a log entry
- Brightness, contrast, levels, gamma on the whole image
- Crop, rotate, enlarge with a stated, simple method (nearest or bicubic)
- Mild sharpening or noise reduction with recorded settings
- Frame averaging of a still object across CCTV frames
Not for evidence
- AI upscaling or "super resolution" that adds detail
- Face restoration or "unblur" apps
- Generative fill, object removal, background replacement
- Any filter you can't name, set and repeat
Make an enhanced copy of 01_working/photos/IMG_0412.jpg: crop to the doorway, raise brightness 15% and contrast 10% on the whole image, enlarge 2× with bicubic. Save it to 02_exports with the settings in the file name and log the exact command.
Exhibits that explain themselves.
A contact sheet puts many photos on one page, each labelled with its file name, capture time and short hash, so anyone can match a printout back to the file.
Make an A4 contact sheet PDF of the 12 photos taken between 14:00 and 15:00, four per row, each captioned with file name, corrected capture time and the first 8 characters of its SHA-256. Title it "PC-001 · Exhibit P1" and save it to 02_exports.
- Number exhibits the way your unit already does. Claude follows your scheme.
- Short hash on every image links paper to file without ambiguity.
- Use the original for the sheet, never an enhanced copy, unless clearly labelled.
Lab 2: photo triage.
1 · Build the timeline
Start the session the same way every time, then ask for the table.
We're working on case PC-001. Read CLAUDE.md first. Then make 02_exports/photo_timeline.csv from every photo in 01_working/photos: capture time, offset, make, model, software, GPS, sorted by time.
2 · Check the clocks
The kit has a photo of a wall clock taken on each device. Use them to find the offsets.
List the photos whose names start with CLOCK_. For each one show me its capture time and camera, and I'll tell you what the clock in the picture shows. Then work out each device's offset and add a corrected_time column.
3 · Put it on a map
Practice data, so map tiles are fine here (Level 1).
Make 02_exports/photo_map.html from the timeline: pins coloured by corrected time, a line in time order, and a popup with file name and time. Open it.
4 · Find the duplicates
The kit hides 3 exact copies and 4 resized look-alikes. Can you find them all?
Group the photos into exact duplicates and look-alikes with a script in scripts/, save 02_exports/duplicates.csv and show me a contact sheet per look-alike group.
5 · Raise the red flags
Some photos were edited, one had its metadata stripped. List the signals, don't conclude.
List every photo showing a sign of editing or metadata removal: editing software, missing capture time, thumbnail mismatch. For each, say which signal and how strong it is. Use "consistent with" wording.
6 · Produce exhibit P1
Finish with something you could hand to an investigating officer.
Make Exhibit P1: an A4 contact sheet PDF of the photos between 14:00 and 15:00 (corrected time), captioned with file name, corrected time and short hash. Log everything we did in this lab.
Day one, done.
Save today's session for case PC-001: update report.md with what we did and found today, list what's left for tomorrow, and make sure logs/commands.md is complete.
Hours of footage, minutes of review.
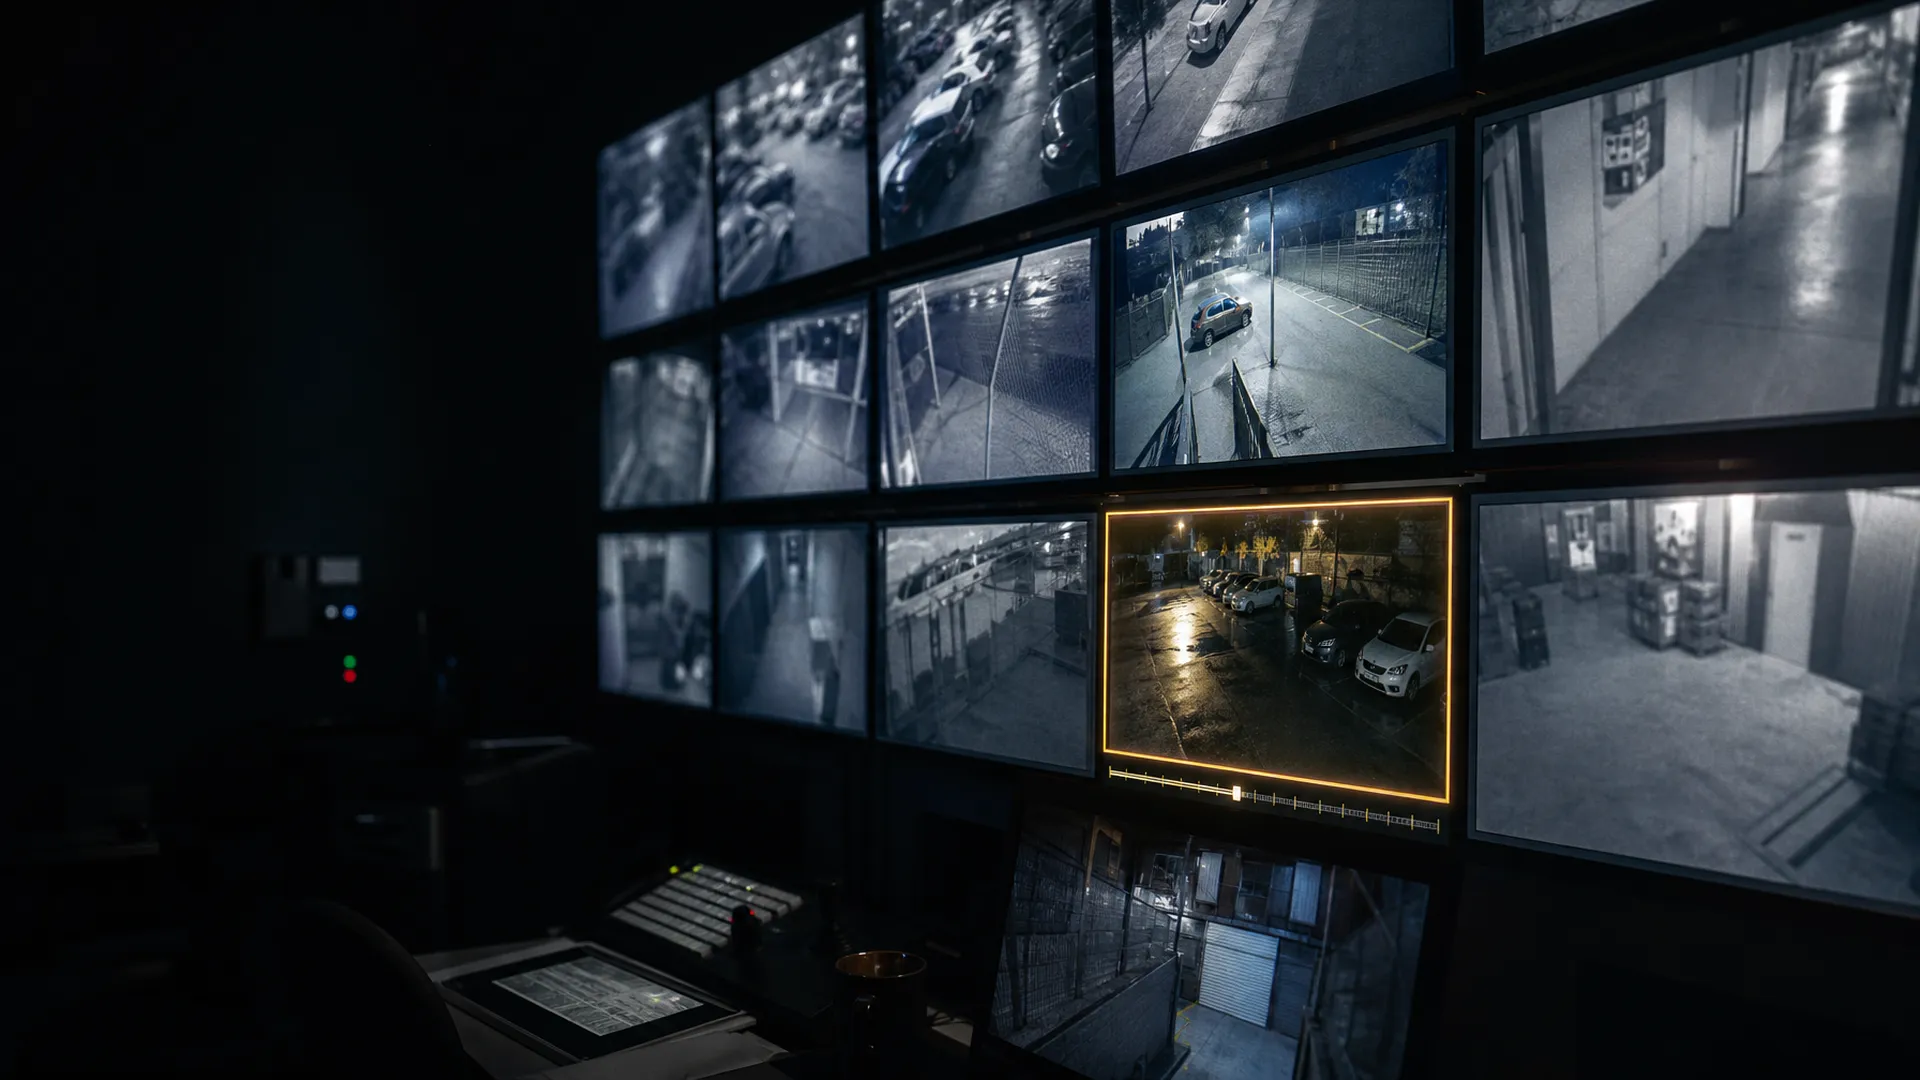
Know exactly what a video file is, pull stills that stand up in court, let the machine find the moments that matter, and cut clips without changing a pixel.
Know the file before you play it.
ffprobe tells you what a video really is: format, resolution, frame rate, length, and when the recorder says it started. Read it before anything else.
- Duration should match what the DVR says was exported. Gaps mean missing footage.
- Variable frame rate is normal for CCTV. It means frame numbers don't map evenly to seconds.
- creation_time is usually UTC (the Z). Malaysia is +8 hours.
Run ffprobe on every video in 01_working/cctv and give me one table: file, codec, resolution, frame rate (and whether it varies), duration and creation time in Malaysia time.
Change the box, not the picture.
DVRs export odd formats (.dav, .h264, .264, .exe players). Often the video inside is ordinary H.264. Remuxing moves it into a normal .mp4 box without re-compressing a single frame.
Remux (copy)
Same frames, new container. Quality and timing untouched.
Re-encode
Decodes and compresses again. Some loss, new file. Use for viewing copies, label it, and keep the remux as the working master.
Stills that stand up in court.
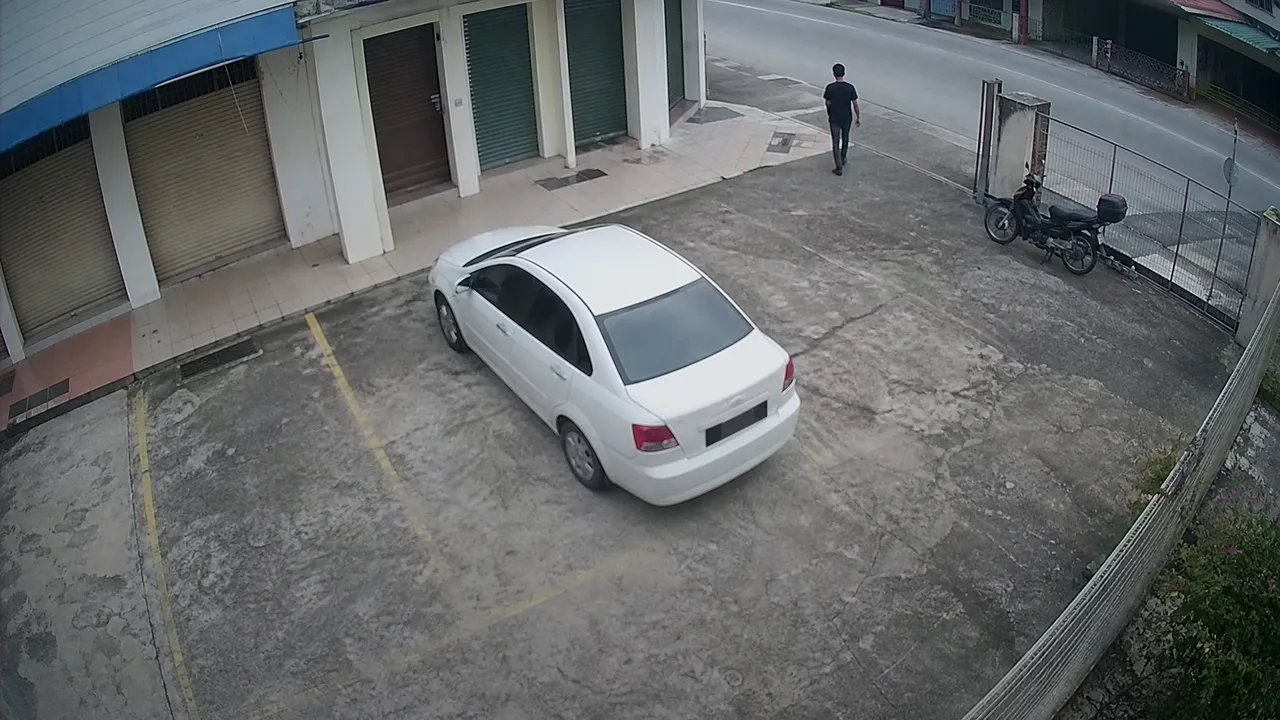
A still should say where it came from: which file, which frame, which moment. Burn that into the image, save as lossless PNG, and the exhibit explains itself.
 CAM02.mp4 · frame 26 43714:36:05.2 (+08)sha256 5a11…f902
From 01_working/cctv/CAM02.mp4 export PNG stills every 0.5 seconds between 00:36:00 and 00:36:10. Burn in the file name, frame number and timestamp in Malaysia time (apply the clock offset), plus the first 8 characters of the file's SHA-256. Save to 02_exports/stills/.
Three hours in, five moments out.
A short Python + OpenCV script compares each frame to the background and lists when something moves in the area you care about. You watch those moments, not the whole recording.
Write scripts/motion.py: find motion in CAM02.mp4 inside the box x 600-1300, y 400-900 (the car park), ignore anything under 2 seconds, and save 02_exports/cam02_events.csv with start, end and a thumbnail per event.
Clip it cleanly.
A clip for the investigating officer should start a little before and end a little after the event, keep the original quality, and be traceable to its source.
| Need | Command idea | Note |
|---|---|---|
| Exact copy of a section | ffmpeg -ss 00:35:50 -to 00:37:30 -i in.mp4 -c copy out.mp4 | No quality loss; may start at the nearest keyframe, a second or two early |
| Frame-accurate start | ffmpeg -ss … -to … -i in.mp4 -c:v libx264 -crf 10 out.mp4 | Re-encoded at very high quality; label it as such |
| Slow motion for viewing | -vf "setpts=4*PTS" | Presentation copy only, never the master |
| Zoom on an area | -vf "crop=640:360:900:420,scale=1280:720:flags=neighbor" | Nearest-neighbour shows real pixels; no invented detail |
For each event in 02_exports/cam02_events.csv make a clip from 10 seconds before to 10 seconds after, using stream copy. Name each clip with the camera and corrected start time, and add every clip with its SHA-256 to logs/commands.md.
Several cameras, one clock.
Each recorder has its own wrong clock. Find one shared moment visible on two cameras (a car passing a gate, a light switching on) and line them up from there.
| Camera | Shows | Real time | Offset |
|---|---|---|---|
| CAM01 gate | 14:31:52 | 14:36:05 | +4 m 13 s |
| CAM02 car park | 14:43:10 | 14:36:05 | −7 m 05 s |
| CAM03 lobby | 06:36:04 | 14:36:05 | +8 h (UTC) |
Using the offsets in logs/clock_offsets.md, make a side-by-side video of CAM01 and CAM02 from 14:35 to 14:38 real time, synced, with each camera's name and corrected time burned in. This is a presentation copy; say so in the file name.
Lab 3: three hours of CCTV.
1 · Inspect every video
Open the session, then let ffprobe tell you what you have.
We're continuing case PC-001; read CLAUDE.md and report.md first. Then give me the ffprobe table for every file in 01_working/cctv.
2 · Make the working master
The kit's recording is a DVR-style .h264 stream. Remux it and prove nothing was lost.
Remux 01_working/cctv/CAM02.h264 to CAM02.mp4 with stream copy, then compare the frame counts of both files and log the result.
3 · Fix the clock
At the start of the recording a phone screen showing the real time is held up to the camera.
Export a still every second for the first 30 seconds of CAM02.mp4 with the frame number and file time burned in. I'll read the phone in the picture and give you the real time.
4 · Let the machine search
Draw the box around the car park, then run the motion script.
Show me one frame from CAM02 with a grid every 100 pixels so I can pick the car park area. Then run scripts/motion.py on that area and list the events in corrected time.
5 · Review it yourself
Watch every event, then spot-check the gaps. Note what you see.
Make a review sheet 02_exports/cam02_review.md with one row per event: corrected time, thumbnail, and an empty "examiner notes" column for me to fill in. Also list the three longest gaps between events so I can spot-check them.
6 · Export the evidence
Stamped stills and clean clips for the events you marked as relevant.
For the events I marked relevant in cam02_review.md, export stamped PNG stills and stream-copy clips with 10 seconds either side, hash every export and log it all.
Video, under control.
Words, faces and fakes.
Transcribe speech without it leaving the building, protect bystanders before footage is shared, and know what deepfakes can and can't be caught by.
Transcripts that stay offline.
Whisper turns speech into text with timestamps, in English, Malay and mixed speech, and it runs entirely on your computer. Slower than the cloud, but nothing leaves.
Install Whisper so it runs offline. Extract the audio from 01_working/audio/REC_0031.m4a to a WAV, transcribe it with the medium model, language auto-detect, and save an .srt and a .txt in 02_exports marked DRAFT. Where the model is unsure, write [inaudible] instead of guessing.
Redact before you share.
Footage released to the public, the media or another agency should hide bystanders' faces and unrelated plates. AI finds most of them fast; a person checks every frame.
1 · Detect
An OpenCV face detector marks faces in every frame. Plates: a plate detector or boxes you draw.
2 · Cover solidly
Use solid boxes or very heavy pixelation. Light blur can sometimes be partly reversed.
3 · Check every frame
Detectors miss faces turned sideways, small or dark. Review the result frame by frame before release.
Write scripts/redact.py: detect faces in a video with OpenCV, cover each with a solid black box padded 20%, carry boxes across frames so short misses stay covered, and write a contact sheet of every 25th frame so I can check it. Run it on a copy of the clip, never the master.
Deepfakes: doubt, then check.
Face swaps, cloned voices and fully generated video are now cheap. Expect defendants to claim real footage is fake, and fakes to be presented as real.
Questions to ask
- Where did it come from? Original device and file beat a social media download.
- Content Credentials? Check with c2patool. Presence is meaningful; absence isn't.
- Does the file fit the claimed device? Codec, resolution and metadata as expected?
- Does physics hold? Lighting, shadows, lip sync, blinking, edges of hair and glasses.
What to do
- Preserve the original file and its source, hashed, before anyone re-saves it.
- Detector scores are leads, not findings. Use more than one, offline where possible.
- Escalate to your specialist lab for a formal authenticity examination.
- Write what you checked, with "consistent with" wording.
When AI writes the summary.
Claude is excellent at turning your log into readable prose. It can also smooth over uncertainty and fill gaps. Give it rules, then check every sentence.
Draft the findings section of report.md using only logs/commands.md, the review sheets and my examiner notes. Every factual sentence must cite the file and time it comes from. Use "consistent with" for anything not certain. Don't describe people or vehicles beyond my own notes. Mark it DRAFT.
- Only your sources. No outside knowledge, no assumptions.
- A citation per fact, so you can check each one in seconds.
- Your observations stay yours. AI may tidy the wording, not add to it.
- You read it all against the sources before removing DRAFT.
Sound, privacy, truth.
The full case.
Everything at once: open, process, review, report and prove the originals never changed. Then a checklist to take back to your unit.
Lab 4: your case, start to finish.
1 · The brief
A second practice case, PC-002: a phone's photos, two CCTV cameras with different clock errors and one voice note. Question from the investigating officer: "Was the white van at the loading bay between 21:00 and 22:00, and who else was there?"
2 · Open the case
Same as Lab 1, faster. You know the steps now.
Open case PC-002 the standard way: folder structure, CLAUDE.md, deny rule, copy evidence in, manifest, read-only, verified working copies, tools.md. Log every step.
3 · Photos
Timeline with corrected clocks, map, duplicates and red flags.
Build the photo timeline for PC-002 with corrected time, list duplicates and editing signals, and show me only the photos between 20:45 and 22:15.
4 · Video
Sync both cameras, search the loading bay, review, export.
Inspect both cameras, work out their offsets from the shared moment I give you, run motion search on the loading bay area between 21:00 and 22:00 real time, and make a review sheet for me.
5 · Audio
Offline draft transcript of the voice note, then you correct it.
Transcribe the voice note offline with timestamps, mark unclear parts [inaudible], and save it as a DRAFT .srt and .txt.
6 · Report and verify
Draft from the log, check every sentence, then prove the originals never changed.
Draft report.md for PC-002 from the logs and my notes using our report template, then re-hash 00_original against logs/manifest.txt and add the verification result to the report.
A report anyone can repeat.
Another examiner, given your report and the originals, should reach the same results. Claude drafts each section from your log; you own every word.
- State AI use plainly: "Commands were written and run with Claude Code under the examiner's supervision. All findings were verified by the examiner."
- Limitations matter: resolution too low to read a plate is a finding, not a failure.
- Follow your agency's format and the rules on computer-produced documents (in Malaysia, Evidence Act 1950, s.90A).
Prove nothing changed.
The last step of every case. One command re-fingerprints every original and compares it with the manifest from day one. Every line must say OK.
When things go wrong.
They will. Almost every problem has a one-sentence fix: describe what you see and paste the error.
| You see | Likely cause | Say to Claude |
|---|---|---|
| "command not found: ffmpeg" | Not installed, or not on PATH | "Install ffmpeg and make sure the terminal can find it." |
| "Invalid data found when processing input" | Proprietary DVR format | "Identify this file's real format. If ffmpeg can't read it, tell me which player I need." |
| "Permission denied" in 00_original | Your lock is working | Nothing. Work in 01_working. |
| Times are 8 hours out | UTC vs Malaysia time | "Convert all times to +08:00 and show both." |
| Motion script finds hundreds of events | Trees, rain, headlights | "Raise the threshold, shrink the area, ignore events under 3 seconds." |
| Whisper is very slow | Big model on a laptop | "Use the small model for a first pass, then medium on the parts that matter." |
Your forensic AI checklist.
Ten ticks for every case. Click them here to practise; print it for the unit.
still certain.
You can now let AI do the hours of sorting, searching and paperwork, while you keep what matters: the evidence untouched, every step on record, and every conclusion your own.
Click anywhere to celebrate
Thank you.
Start small. Take one real, routine task back with you, maybe the photo timeline or the CCTV event list, and do it this way on your next case.
Share your prompts and scripts with your team, agree on one case-folder shape, and keep improving the checklist together. Good habits spread faster than tools.
The technology will keep changing. The principles won't: preserve, document, verify, and let people decide.